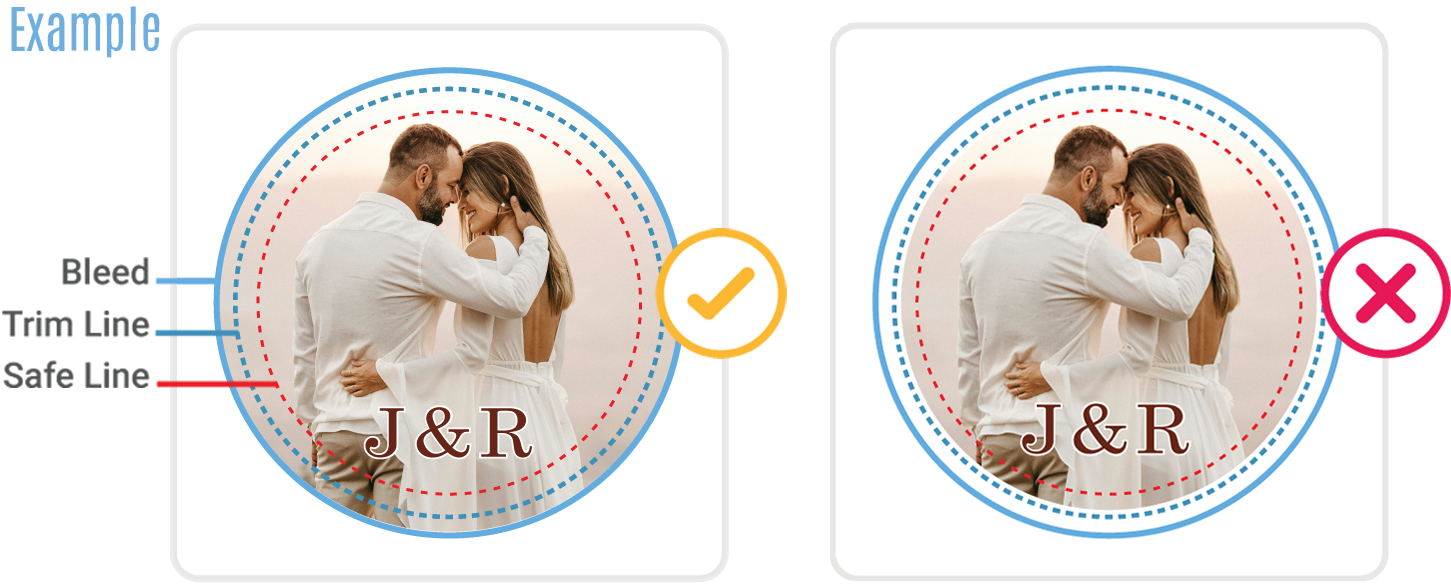
Each product has print guides and marks to help you adjust your artwork. Every product will have a blue dashed line called a 'trim line', this is the border where your artwork will be cropped to fit onto the product, so make sure any important elements don't go over this line.
Products that can be printed from edge to edge will have a red 'safe line'. All content within the safe line is guaranteed to be printed on your product. Content outside this line may be cut off, so keep text and important parts of your photographs, logos and artwork within the safe line.
These edge to edge products also have a solid blue line called a 'bleed'. If you want your artwork, photograph or background colour to be printed up to the edges, you should extend it up to the bleed line to ensure the final print has no gaps.
When you upload your content it will automatically be positioned in the center. You can adjust the position of your text or artwork by clicking and dragging, making sure you stay within the trim and safe lines.
Your artwork will automatically be enlarged to the full size of the canvas. You can resize anything on your canvas by clicking and dragging the white dots on the corners of the object. Note that if your image has a low resolution, stretching can cause your image to look distorted.

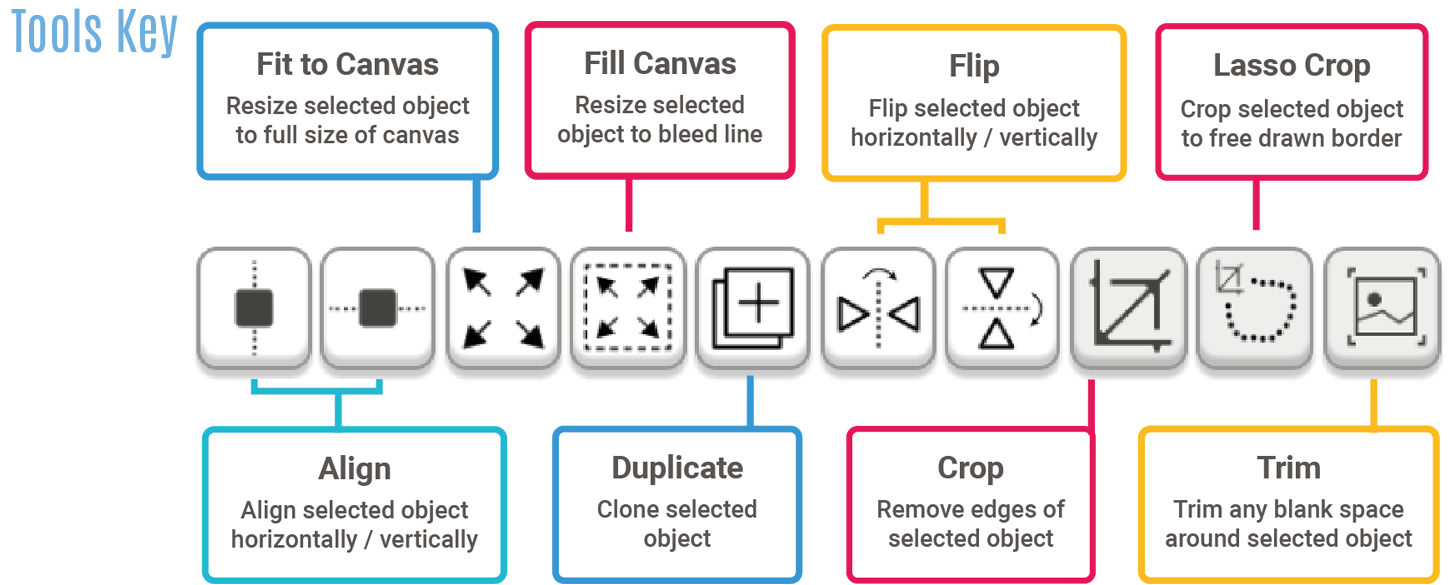
We recommend using the handy layout tools available in our online customiser to make your product quick and easy to create.
